Learn how to create and map your SOLIDWORKS attributes on the 3DEXPERIENCE platform using the Collaborative Spaces Configuration Center, step by step.
I. Attribute mapping – 3DEXPERIENCE
1. Properties and attributes
A property (SOLIDWORKS) or an attribute (3DEXPERIENCE) is a piece of data with a name, a type and a value.
For example the property: [Material, text, Hardened Steel].
They can be assigned to parts, assemblies or drawings to access data or to assign data (a supplier name, a revision number or a last modification date).
2. Mapping attributes
We will first see how to create attributes on the 3DEXPERIENCE platform.
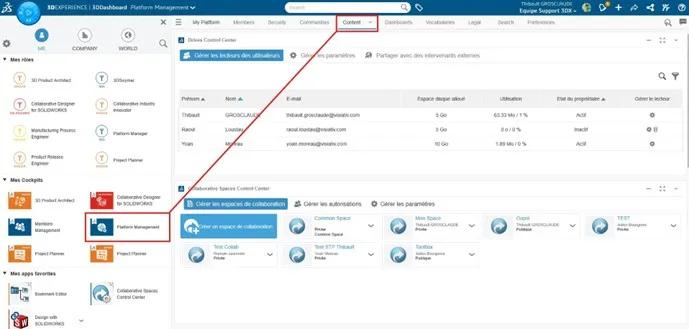
To begin, open the Platform Manager and click on the Content tab.
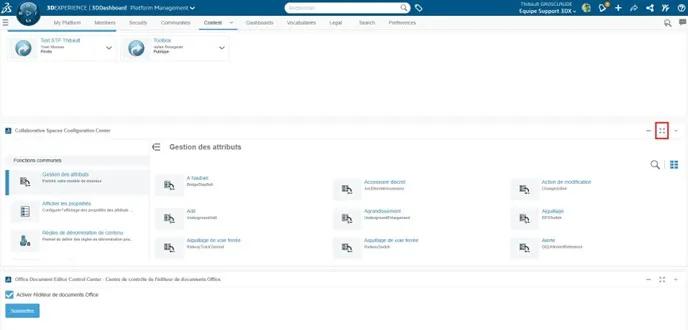
Scrolling down, you will find the Collaborative Spaces Configuration Center application. Double-click on the name to display it in full screen.
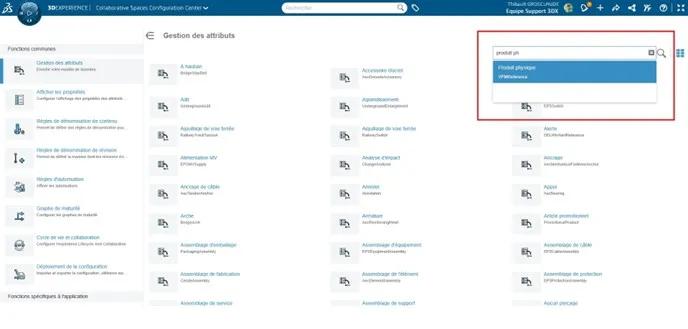
In the left-hand menu, click on Attributes Management, then, using the search tool on the right, search for "Physical Product".
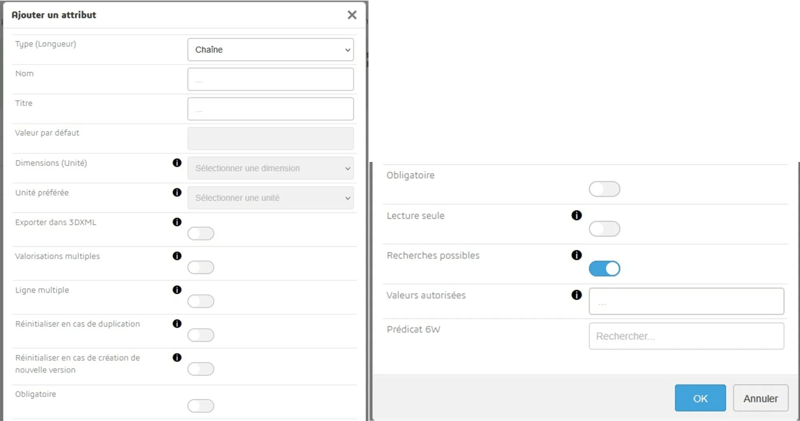
Click on the ➕ to create a new attribute. The creation menu then appears:
Several options are available in this menu:
The property type:
This can be a string, a Boolean (Yes/No), a date or a number.
The property name
is important because it is the one the platform will use to interact with SOLIDWORKS. It must therefore be short, meaningful and cannot contain special characters.
The title
is what will be displayed in the platform interface when searching for the attribute.
For example, if you want to create a property for the supplier name of a part, you would have:
Type:
string
Name:
Supplier_Name
Title:
Supplier Name
The mandatory nature of an attribute:
If an attribute is mandatory, a file cannot be saved without having filled it in beforehand.
After clicking OK to save the attribute, click Apply to ensure it is properly taken into account.
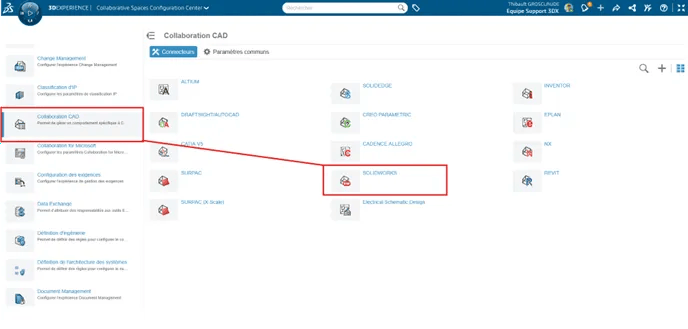
Now that the attribute has been created, we will link it to SOLIDWORKS so it can be used. Go back to the Collaborative Spaces Configuration Center application (Step 2). In the same menu as Attributes Management, scroll down to find the "Collaboration CAD" function. Then click on SOLIDWORKS.
Depending on the type of component to which you want to apply the attribute (Assembly, Part or Drawing), scroll to the corresponding menu and click on the ➕.
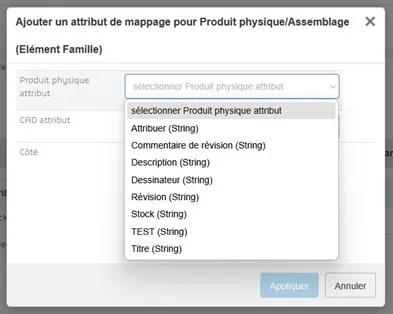
In the window that opens, you can select the attribute you created and choose in which direction the information flows between the platform and SOLIDWORKS.
Click Apply and then Apply again to ensure the attribute is saved correctly.
To make sure the platform properly takes our changes into account, go to the Configuration Deployment tab.
In the "Configuration and server utilities" section, click on Update the index model then on Reload the cache.
Finally, in the Attribute propagation section, click on Search then Propagate.







 Maxime CASIER