 Maxime CASIER
 Local cache management - SOLIDWORKS PDM
The SOLIDWORKS PDM local cache is a space reserved for the PDM safe. It is present only on client workstations and is different for each machine.
 Roman Fradin
I. Objective
SOLIDWORKS is tightly integrated with the Windows operating system. Sometimes, Dynamic Link Library (DLL) files, which are responsible for data exchange between Windows and SOLIDWORKS, break their link and cause unusual behaviour in SOLIDWORKS. Often, a simple repair of the SOLIDWORKS installation cannot resolve this issue. In such cases, it may be necessary to perform a fresh installation of the software.
A fresh installation removes all files and registry keys that link SOLIDWORKS to the operating system. This process can help save time when troubleshooting high-level issues. Common sources of such behaviour include Windows upgrades, SOLIDWORKS upgrades, corrupted registries, and interaction with third-party software.
To perform a clean reinstallation of SOLIDWORKS, follow the instructions in this document.
This document serves as a guide. Take care to study your PC's configuration and requirements. This document includes operations in your registry editor, so you must be very careful when working in it. Certain actions can have serious consequences on your workstation.
II. Recommendations
Make sure you are an administrator on the workstation.
If you wish to keep your SOLIDWORKS personalisation after uninstallation, you must back up your user settings beforehand using the Copy Settings Wizard.
In the case of PDM or Electrical usage, please contact your PDM administrator or our PDM - Electrical support team.
Items to back up if needed:
Sheet format templates
Document templates
Table templates (BOM, revision, etc.)
Custom weldment profiles
Custom hole wizard library
etc…
III. Uninstallation
1. Note your SOLIDWORKS licence number
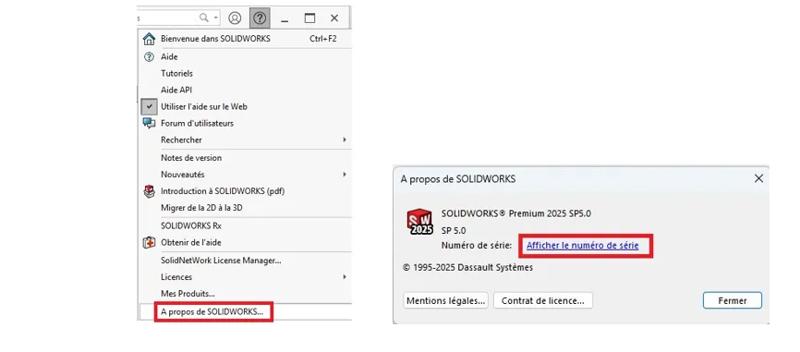
Launch SOLIDWORKS, go to "Help" (or "?") then "About SOLIDWORKS" and finally "Show Serial Number".
2. Releasing or deactivating the licence
First and foremost, for security purposes, release your licence(s).
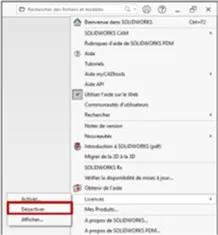
In SOLIDWORKS, go to Help (or "?") then "Deactivate Licence".
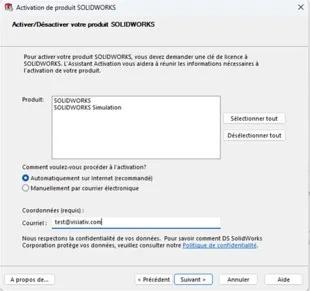
Select the module(s) to deactivate and choose your preferred deactivation mode: "Automatic"or "Manual", then click "Next".
In automatic mode, SOLIDWORKS will deactivate the module(s). Manual mode requires a separate action for each module.
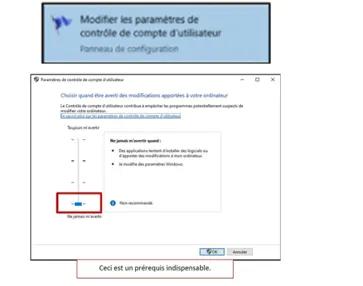
3. Lower User Account Control (UAC) settings
In your Windows Start menu, type "UAC" and launch the application.
In the dialog box, slide the gauge all the way down and click OK.
Restart the workstation to apply the changes.
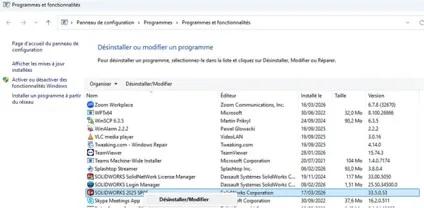
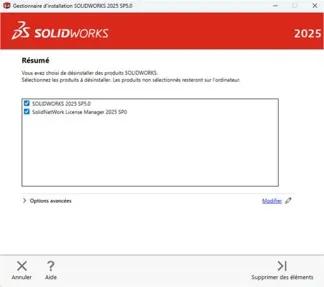
On the Summary screen, make sure all products are checked.
In Advanced options, click "Modify".
In this menu, check all boxes to remove all SOLIDWORKS installation paths and all registry entries that could compromise the quality of your next installation.
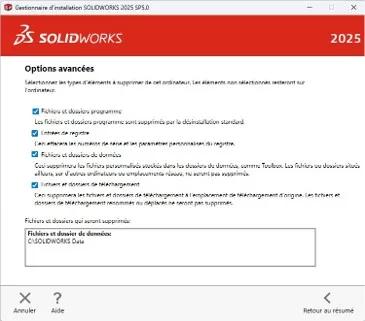
Click "Back to Summary".
Click "Remove Items".
Before starting a new SOLIDWORKS installation, it is preferable to restart your workstation.
IV. Installation
Before any installation, it is recommended to:
Disable firewall and antivirus
Be logged in with an administrator account
Be logged in as a local administrator or domain administrator
Verify that the workstation meets Dassault SOLIDWORKS requirements:
https://www.solidworks.com/sw/support/SystemRequirements.html
Warning: When downloading the installation sources, the downloaded file is a ZIP file. You must unzip the contents before starting the installation.
If you get a blank page when launching the Setup, follow these steps: in the folder "SOLIDWORKS installation source folder"\sldim\lang\english\html", right-click on the file frameset.html, select Properties and click the Unblock button.
If you have a 3Dx account with Dassault, you can download the sources at: https://www.solidworks.com/support/subscription/downloads
1. Installing SOLIDWORKS
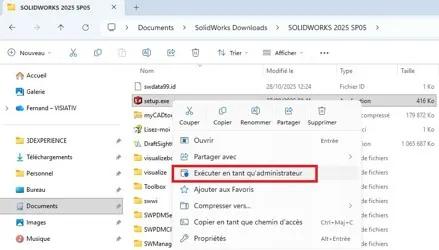
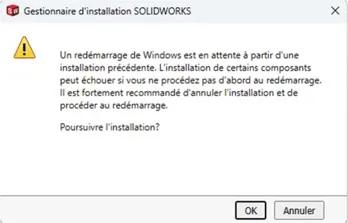
If you get this message on launch, click "OK".
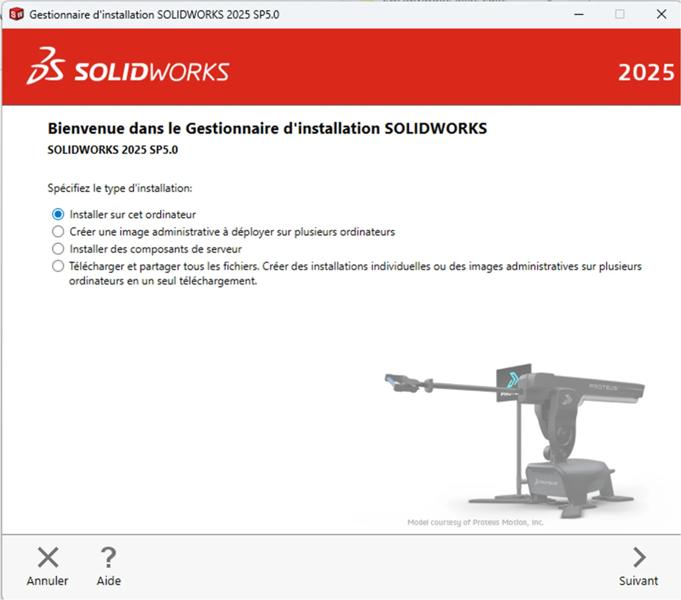
Select the first option "Install on this computer", then click "Next".
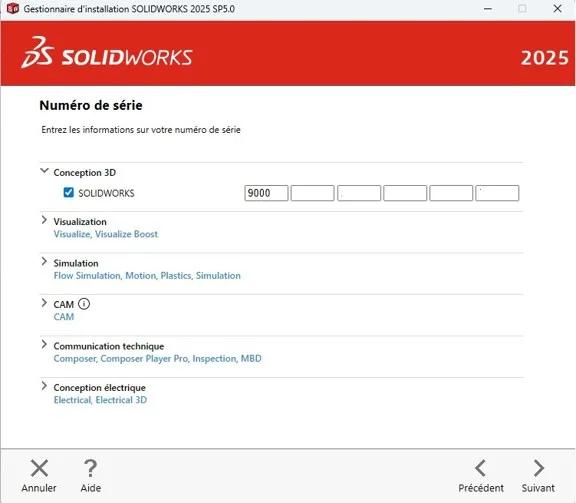
Enter your serial number(s) on this page. Click "Next".
For a multi-product licence, the same number must only be entered once.
All 6 fields of the serial number must be filled in.
The licence number entered should theoretically check the modules associated with your purchase. You can still correct this on the next page in the product list.
At this stage, you can launch the installation.
However, if you wish to install multiple versions on your workstation, it is preferable to index the SOLIDWORKS installation folder and the Toolbox folder with the version number. Use the "Modify" button next to each line to define the path.
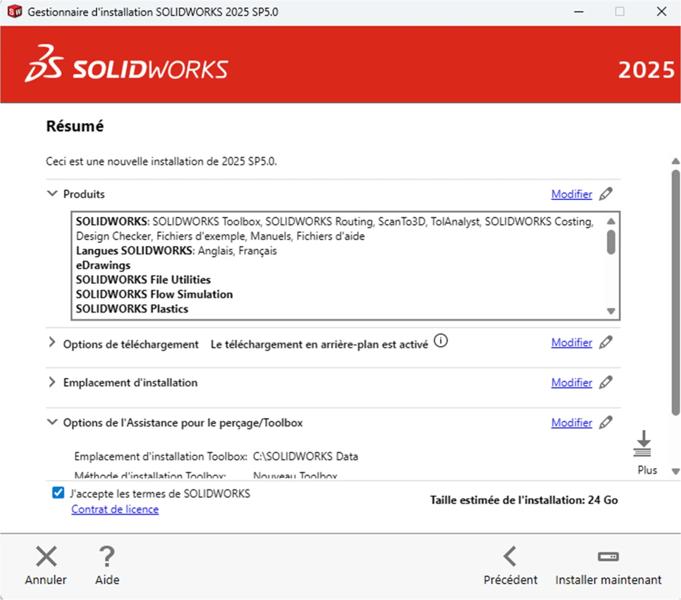


This will make it easier to identify file location paths and avoid confusion during updates.
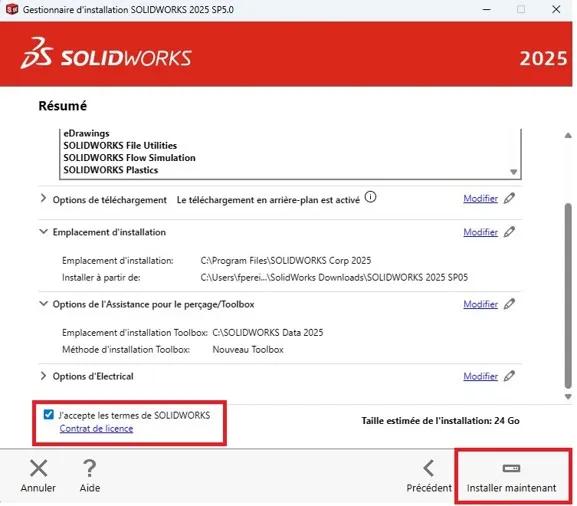
In the Summary, check the box "I accept the SOLIDWORKS terms" then click "Install Now" to launch the SOLIDWORKS installation.
V. Activation
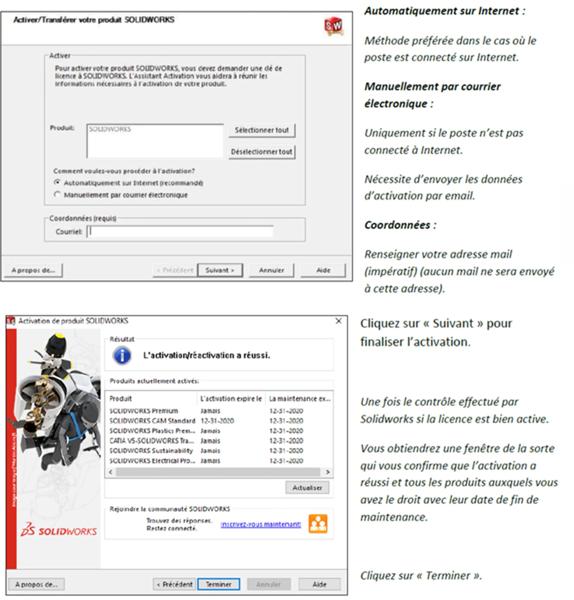
The activation wizard opens automatically when launching SOLIDWORKS if no licence is activated.
Automatically over the Internet:
preferred method when the workstation is connected to the Internet.
Manually by email:
only if the workstation is not connected to the Internet. Requires sending activation data by email.
Contact information:
enter your email address (mandatory — no email will be sent to this address).
Click "Next" to finalise the activation.
Once SOLIDWORKS has verified that the licence is properly active, you will receive a window confirming that the activation was successful, along with all the products you are entitled to and their maintenance end dates.
Click "Finish".
 Maxime CASIER Maxime CASIER