") Coralie
Coralie SOLIDWORKS Esquisse 3D: 6 tips to know

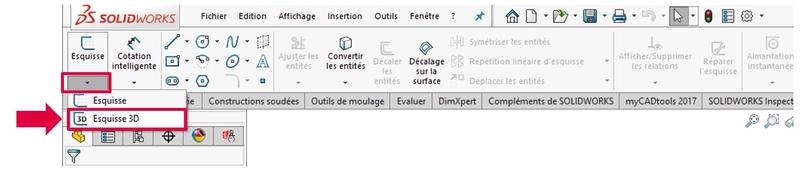
1. Start a 3D sketch
To start a 3D sketch in SOLIDWORKS, go to the "Sketch" toolbar. Then pull down the "Sketch" menu and choose "3D Sketch".
2. Managing axes during SOLIDWORKS sketch creation
When drawing sketch lines, SOLIDWORKS helps by displaying a reference point at the origin. You can switch between reference planes (XY, YZ and ZX) by pressing the TAB key on the keyboard.
This will make it easier to bring the geometry to the correct plane or axis.

3. Use sketch relationships
Sketch relationships let you add relationships with existing entities or with model axes "along X, Y or Z".

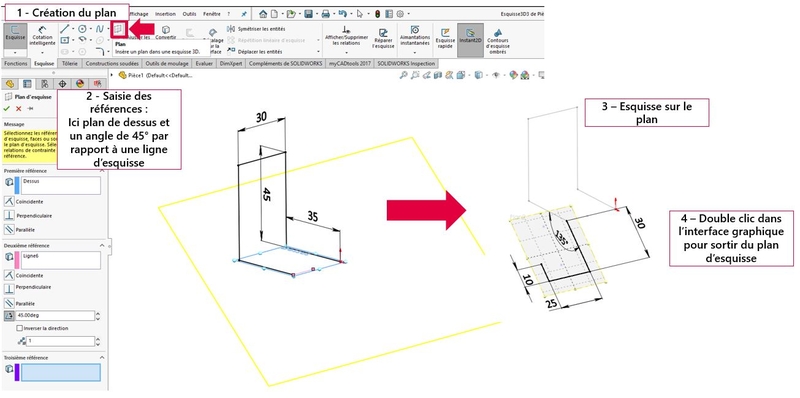
4. Based on plans
To build your geometry, you'll certainly need to rely on blueprints.
You can use existing plans (double-click on the plan to activate it in the 3D sketch)
Or build plans directly in the sketch
In the "Sketch" tab, click on "3D sketch plan", then select the references.
Note that the plan created is not fully constrained by default: you will need to add the necessary sketching constraints. You can then continue sketching on the newly created plan. To exit, simply double-click in the graphics area.
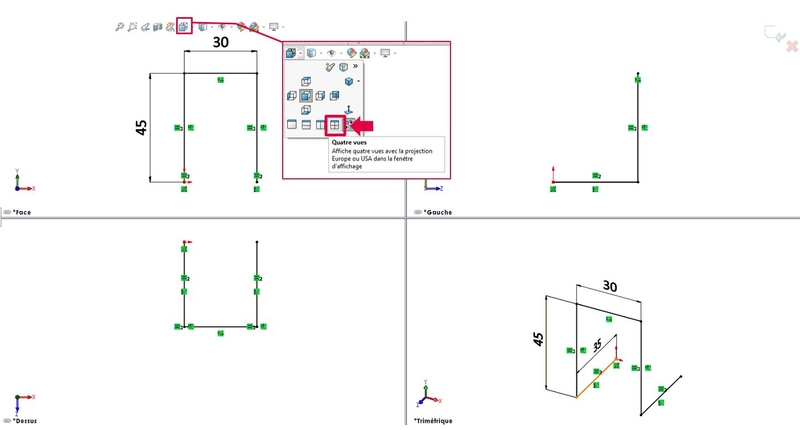
5. SOLIDWORKS 4 view 3D sketching mode
Switching your display to "4 view mode" will help you better visualize your 3D sketch. To access it, go to menu :
Window > View window > Four views
Or, in the viewfinder display, view orientation > Four views (see image below).
6. Moving entities (surfaces or edges) in a 3D sketch
Since SOLIDWORKS 2017, you can shift entities (faces or edges) from a 3D sketch to a surface. In a 3D sketch, go to the "Sketch" tab, "Shift to surface" and select the edges or faces to be shifted.
In conclusion
SOLIDWORKS 3D sketches enable you to design your welded frames and wire parts very quickly. SOLIDWORKS 3D sketches can also be used to model surfaces for the design of shaped parts.