") Maxime CASIER
Maxime CASIER SOLIDWORKS Toolbox: adding custom properties

The SOLIDWORKS Toolbox library can be customized:
add information specific to your company
add customized properties to Toolbox components, such as material, price, supplier, code, etc.
We'll now look at how to add customized properties to Toolbox components: material, CAPM code, supplier reference, etc.
Setting up SOLIDWORKS Toolbox
First, launch the Toolbox configurator from the SOLIDWORKS options menu:
Tools > Options... > System options > Drilling assistance/Toolbox > "Configure" button
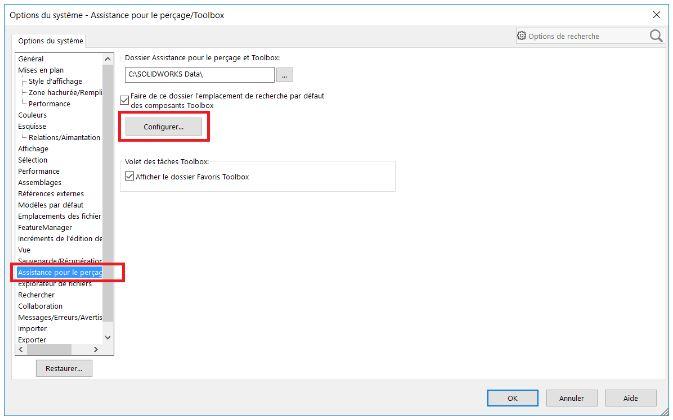
Next, the Toolbox settings menu opens:
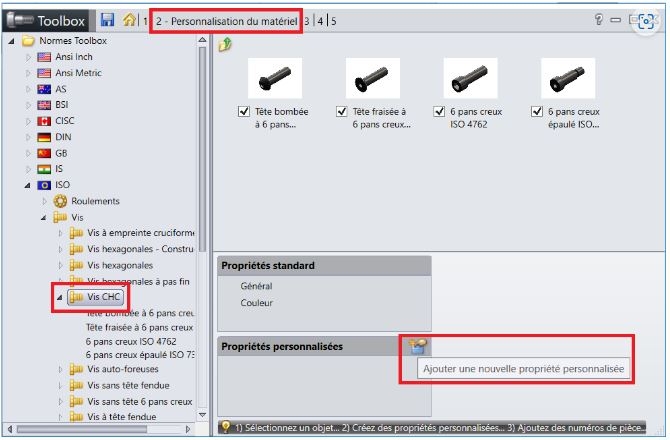
Select the "2 - Hardware customization" menu e
Choose the item on which to apply this property (Standard, product family, specific item).
We have chosen to add a property to the CHC screw family.
Add a simple custom property
First, enter the name of the property to be created: for example, "Supplier".
Then check the options:
Check "Add as a configuration-specific property" to add the property only to the active configuration.
Check "Show in PropertyManager" to display the property after inserting the component.
Type = "Text zone
Enter "emile-maurin" for "Default global value".

Finally, press the "OK" button to confirm.
Enabling the "supplier" property
To do this, check the box in front of the "Supplier" property to activate it.
The property will then be set for all components in the "CHC screws" family, with a default value of "emile-maurin".

Add a custom material property
To perform this action, repeat the steps from the beginning:
Select the "Add a new custom property" button
Enter the property name: "Material" in this example
Check the "List" option to have a list of several choices, and display the "Link to material" option.
Checking the "Link to material SW" option will assign all the properties of a SOLIDWORKS material to a name. For example, the Toolbox material "STEEL" will correspond to "Alloy Steel" in SOLIDWORKS.
Add all the materials you need.
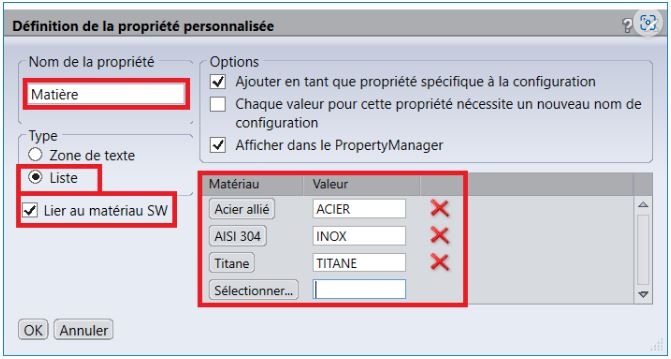
6. Confirm with the "OK" button
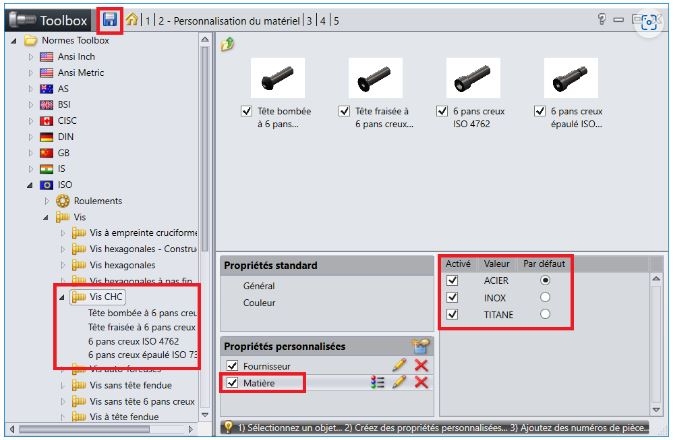
7. Check the box in front of the "Material" property to activate it.
8. The default value is "STEEL".
9. Save with floppy disk for testing.
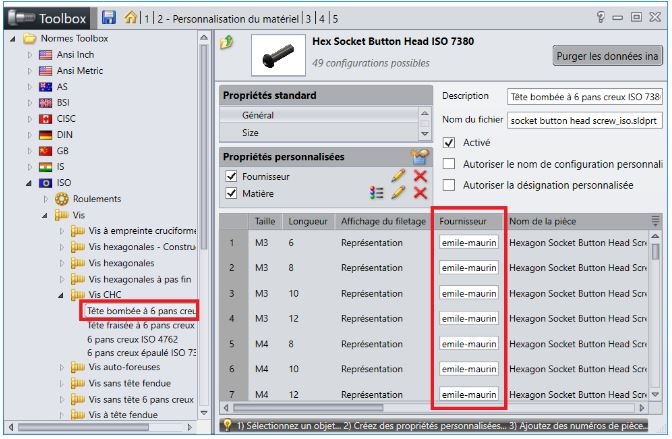
10. Control in Toolbox menu
Click on one of the CHC screws to display the available sizes.
A "Supplier" column has been added with the value "emile-maurin" for all sizes.
Moreover, if you add other properties, such as a code, it will be possible to enter a different value for each size. It is also possible to export the list of sizes to an Excel file, making it easier to fill in the values and re-import the list.
11. Control in SOLIDWORKS
Create an assembly
Insert one of the ISO CHC screws
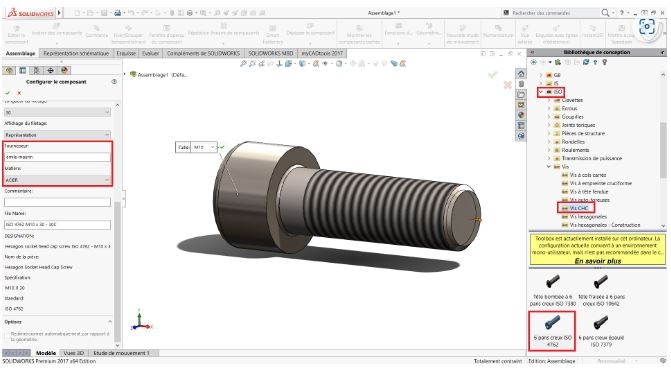
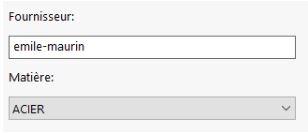
The properties added in Toolbox appear in the SOLIDWORKS menu with the references of the chosen size. The desired material can be selected from the drop-down list.
In conclusion
In short, to ensure that Toolbox components are fully documented in your BOMs, simply customize the Toolbox components with your company's information.