") Maxime CASIER
Maxime CASIER How do I customize a material in SOLIDWORKS?

SOLIDWORKS offers a materials database integrated into the software. As this database is not suitable for all requirements, it is sometimes necessary to customize it for specific cases (SOLIDWORKS material customization). The aim is to adapt it to your specific needs, particularly for simulation purposes.
1. Create a new materials library
First, to access the material base, we'll start by creating a new part file.
The rest of the procedure is identical to applying a material to a part. In the FeatureManager, right-click on "Material", then "Edit material".
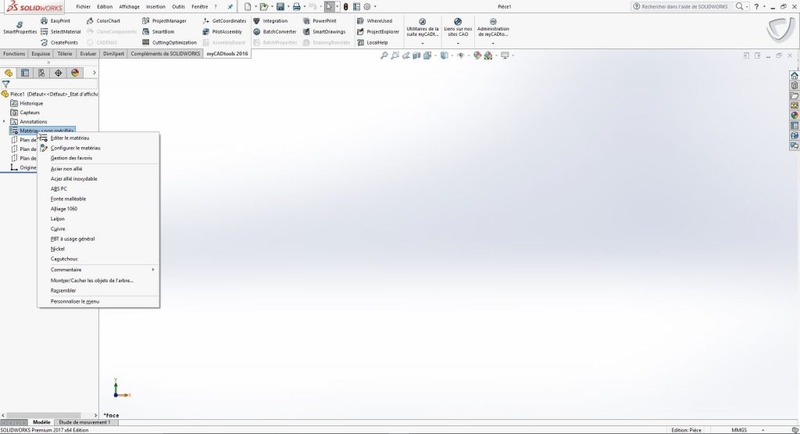
Once we've clicked on "Edit material", we're taken to the graphical interface for selecting a material from an existing database. It's in this same interface that we can generate our own database.
So, in this interface, we'll right-click and select "New Library".

SOLIDWORKS will then prompt you to save the library in the default location. You can choose another location at this stage.
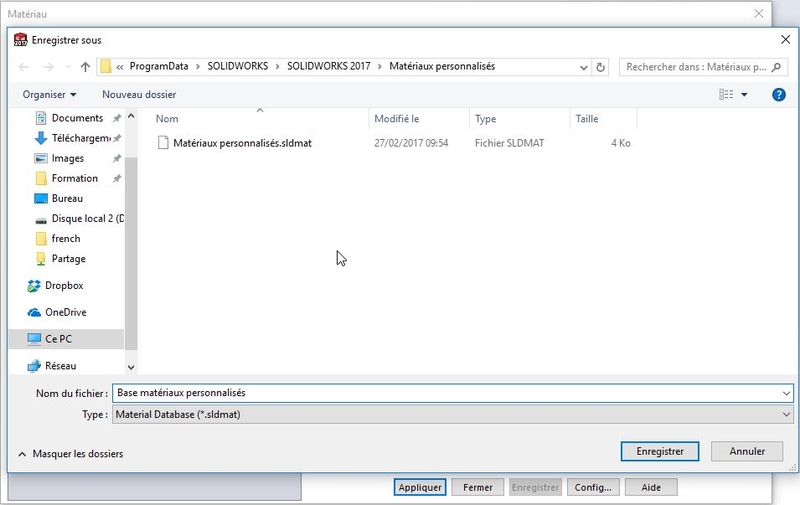
Warning: if you choose to save in the default location, you risk losing your database the next time you update a major version!
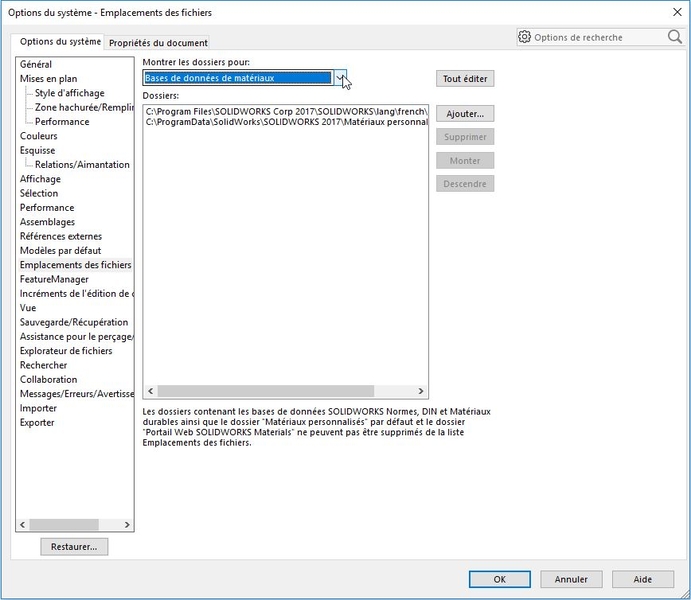
To secure and share your data with your colleagues, you can save this database outside SOLIDWORKS, for example on a server.
To do this, go to SOLIDWORKS Options, File Locations, then choose "Materials database" from the drop-down menu and add the desired location.
2. Creation of a new material
In a second step, we'll look at how to create a new material in your custom library. To do this, first generate material categories by right-clicking on the library and selecting "New category".

From here, you can either create a new material by right-clicking on a category, "New material", or copy an existing material and paste it into your category.
This will give you access to the material menu.
We'll now take a tab-by-tab look at the material definition window.
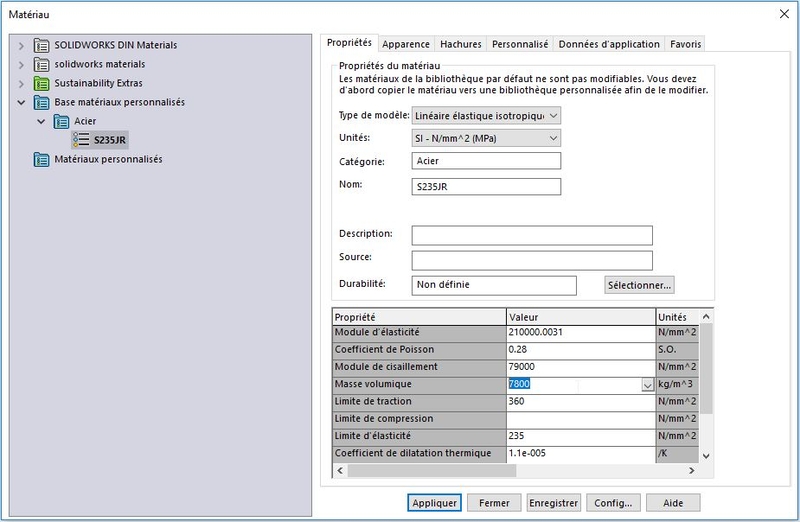
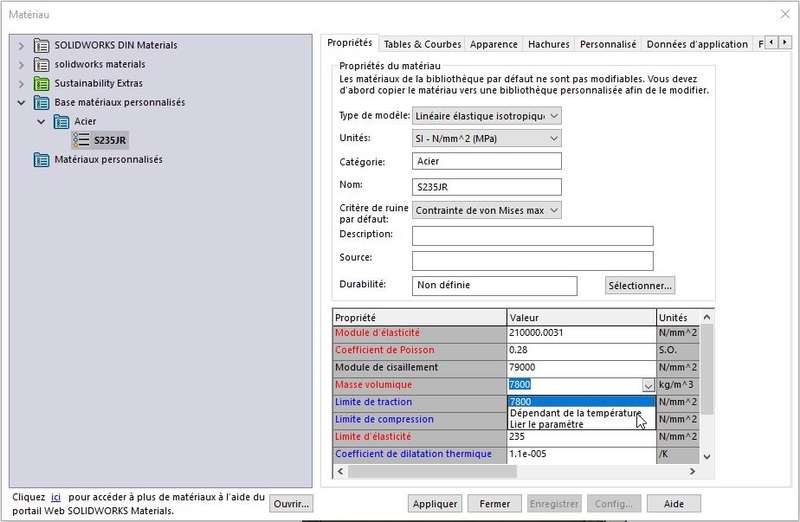
Properties
Model type: defines the material's behavior; the most common is "Linear elastic isotropic" (linear behavior in all directions).
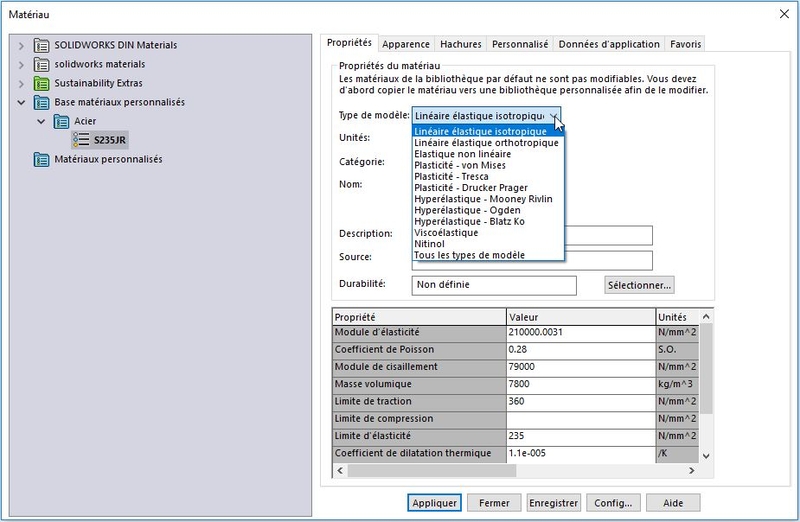
Unit: defines the unit system used to enter characteristic values below.
Category: name of the category under which the material has been saved.
Name: corresponds to the name assigned to the material, which will appear in the FeatureManager.
Description: to add a comment or reference
Source: used to indicate, for example, a regular supplier or the source of feature values.
In the window below, we need to complete the material characteristics. If you don't have SOLIDWORKS Simulation, only the density value will be useful. This is used to calculate the mass of your parts and their center of inertia.
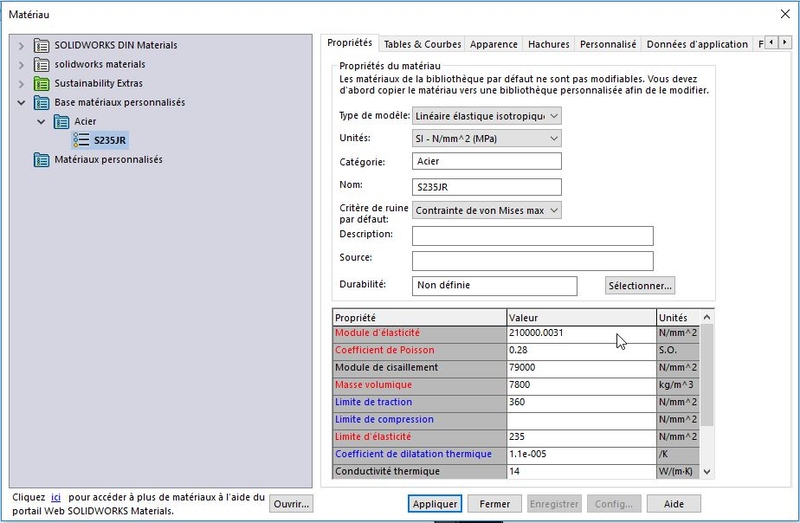
When using a material in a simulation study, you will notice that certain properties are highlighted in red: this means that they are mandatory for this type of study.
Other properties will be highlighted in blue: this means they can be used to increase the accuracy of calculations and obtain additional results in the study.
For some studies, such as thermal studies, you'll need to link material characteristics to tables (tab only available when a study is open).
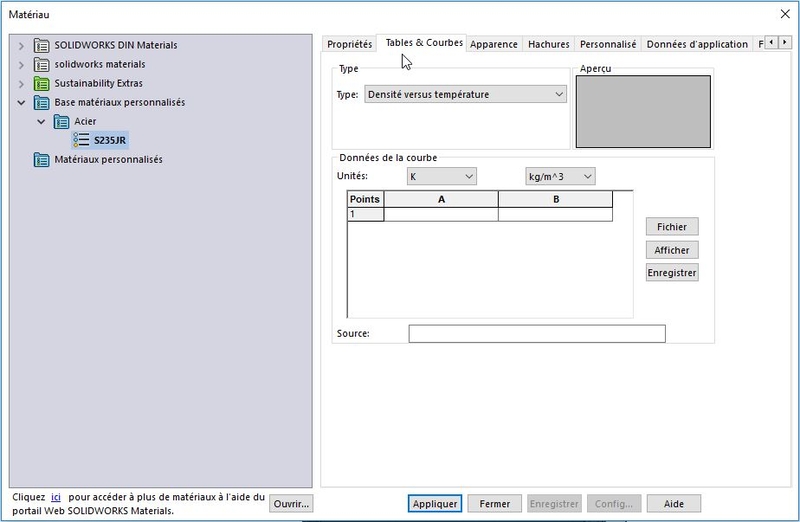
To do this, complete the characteristics in the "Tables & Curves" tab and save as you go along (note the units). Then, in the "Properties" tab, select the characteristic and click on Temperature-dependent.
For fatigue calculations, you'll need SN curves. To integrate SN curves into the material, create a fatigue study and edit the material. This is when the SN curve tab appears.

Alle informatie die in dit tabblad is ingevoerd, kan niet worden opgehaald uit de documenteigenschappen.
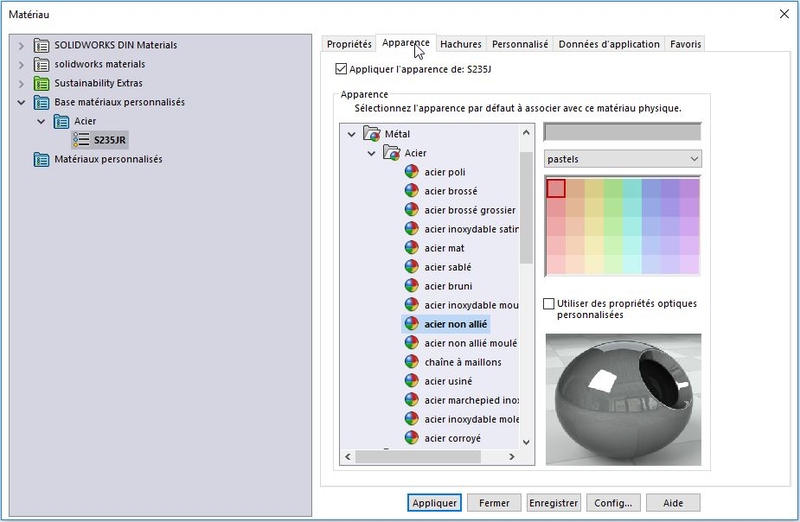
Appearance
The "Appearance" tab is used to define the default appearance of the components to which the material is applied. We can choose a predefined appearance and apply a color to it.
Chop
The "Hatch" tab lets you define the "pattern" of automatic hatching in the drawing for this material, and thus set it to the ISO standard.
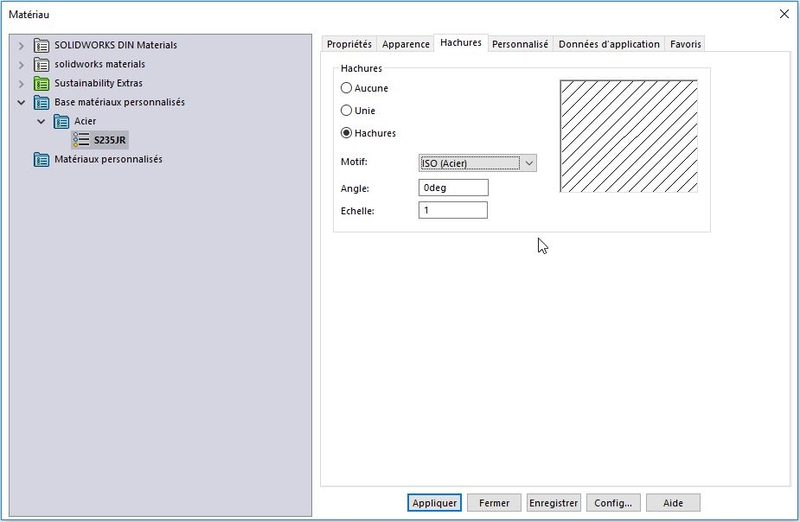
Hatching is defined in the text file: C:Program FilesSOLIDWORKS CorpSOLIDWORKSlangfrenchSldwks.ptn, which can be edited with Notepad.
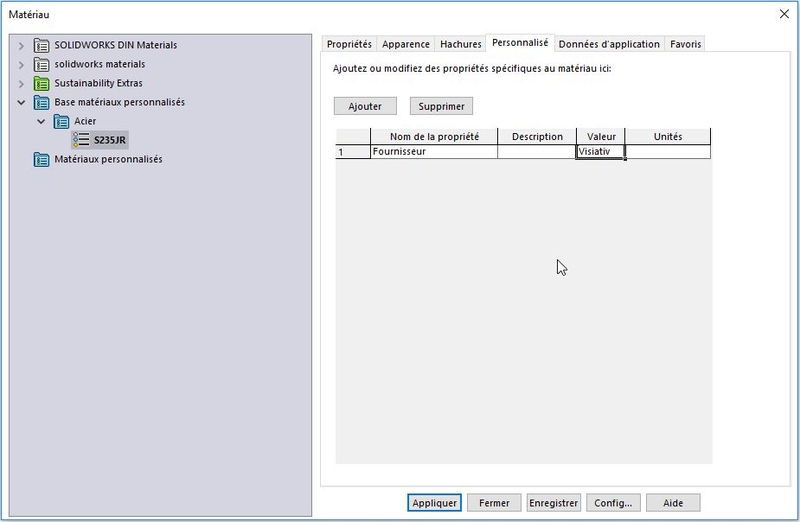
Personalized
The "Custom" tab lets you define material-specific properties. These properties, unlike the document properties, cannot be retrieved directly in the drawing.
However, with the MyCADtools SelectMaterial utility (one of 48 myCADtools utilities, a module available in the myCADservices Premium suite), it is possible to retrieve and redirect these properties to document properties.
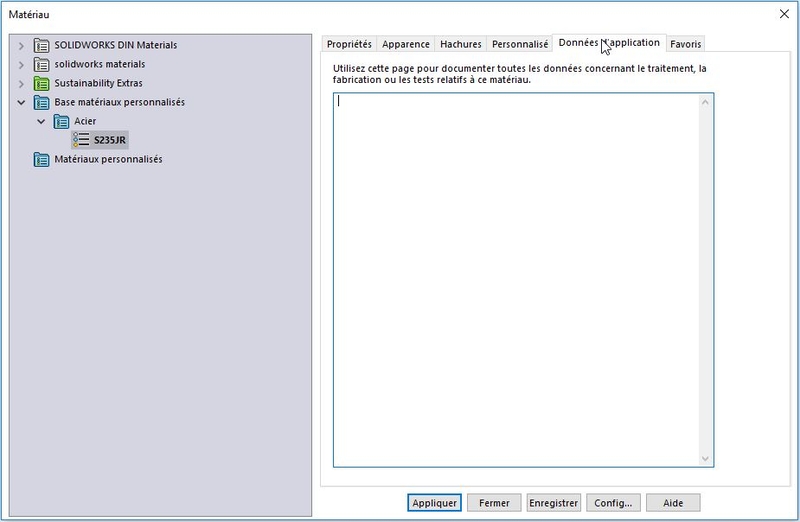
Application data
The "Application data" tab lets you assign various comments about your material. These comments cannot be retrieved.
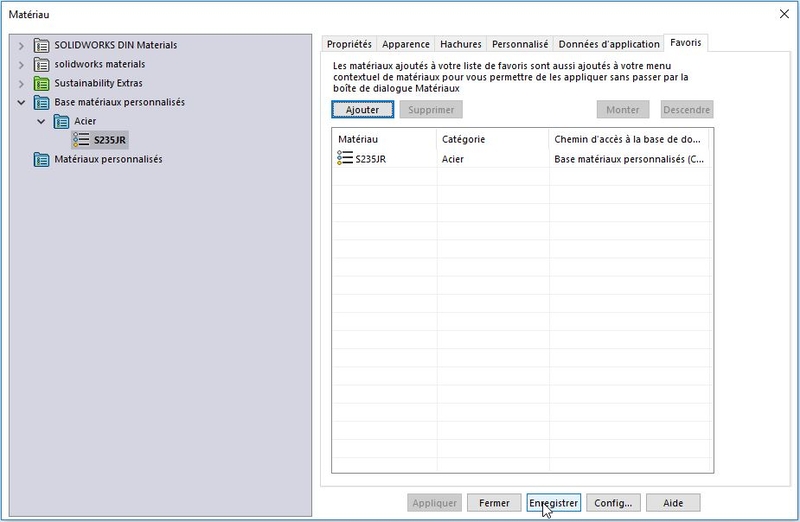
Favourites
The "Favorites" tab lets you define your material as a "favorite material". You can then apply this material to your parts by simply right-clicking on "Material" in the FeatureManager, without having to go through the dedicated interface.
Tip
If you are a subscriber to myCADservices Premium, you have access to our online platform, which provides numerous services including a resource center (tutorials, training courses, etc.).
If you are a subscriber, you can download a standardized database of materials compiled by our industry experts.